💎 Joystick Heartbeat & Calibration
Test, calibrate, and fix controller thumbstick offset, circularity error, and center point drift online in your browser.
Connect Controller for Heartbeat
The diagnostic terminal requires an active hardware signal to begin baseline analysis. Connect your gamepad via USB or Bluetooth and move the thumbsticks or press any button.
Joystick Calibration – Fix Controller Stick Offset & Drift Online
Over time, the sensors inside a thumbstick shift due to wear, dust, and heavy use. When that happens, the controller stops reporting a true neutral position, and you get unwanted movement even when your hands are still. Joystick calibration resets your stick's center point, range, and accuracy so the controller reports correct X-axis and Y-axis values.
This tool samples where your sticks sit naturally at rest, overwrites the factory offset values, and restores accurate input across the full range of motion. Whether you search for joystick calibration or stick calibrator, the process is the same: measure, correct, verify.
Calibration is the first free fix to try before assuming you have permanent hardware drift. Scroll up to the Calibration Tool and get a clear reading right now.
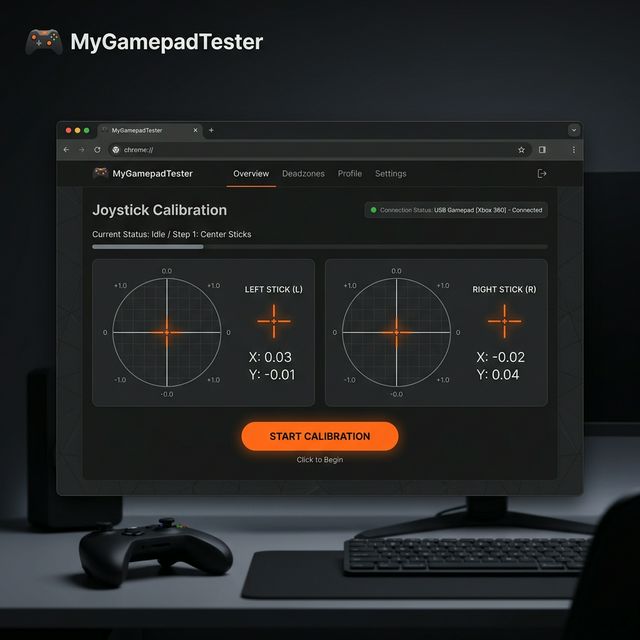
Skip the guesswork and get a clear reading immediately.
Use the free Joystick Calibration tool and see your stick values in real time, no download needed.
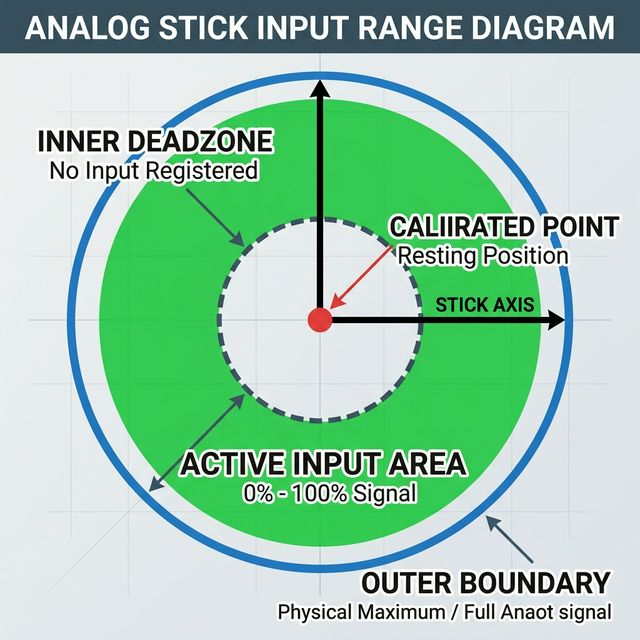
Center Point, Range, and Deadzone Explained
The center point is what the controller reports when you are not touching the stick. Calibration corrects this value directly. The range describes how far the stick travels from center to edge, and a properly calibrated stick should reach full output before hitting the physical end stop.
The inner deadzone is the area around the center where small movements are ignored entirely. Getting the calibration right at the source means you don't have to keep increasing your in-game deadzone settings to stop your camera from spinning.
Learn more about how calibration and dead zones work together in this detailed guide from SCUF Gaming.
How Joystick Calibration Works
The calibration process works in three stages: measure, overwrite, and verify. First, the tool reads the resting position of your stick and records the current X and Y values.
Record Center Point
The tool recalculates what the center should be and writes corrected default values to bypass minor sensor drift.
Map Full Range
You move the stick in circles to map the complete direction and range of travel in each cardinal and diagonal direction.
Firmware Update
For wired connections, these values are often stored at the firmware level, meaning the fix persists across devices.
How to Use the Joystick Calibration Tool: Step-by-Step
Connect via USB
A wired connection is required to write corrected values. Bluetooth can read sticks but often blocks writing.
Open in Chrome or Edge
Chromium-based browsers provide the most reliable Gamepad API support for calibration.
Activate the Tool
Press any button on the controller to wake the Gamepad API and detect your stick values.
Map Motion
Move each stick in slow, full circles. This maps the full range of motion in every direction.
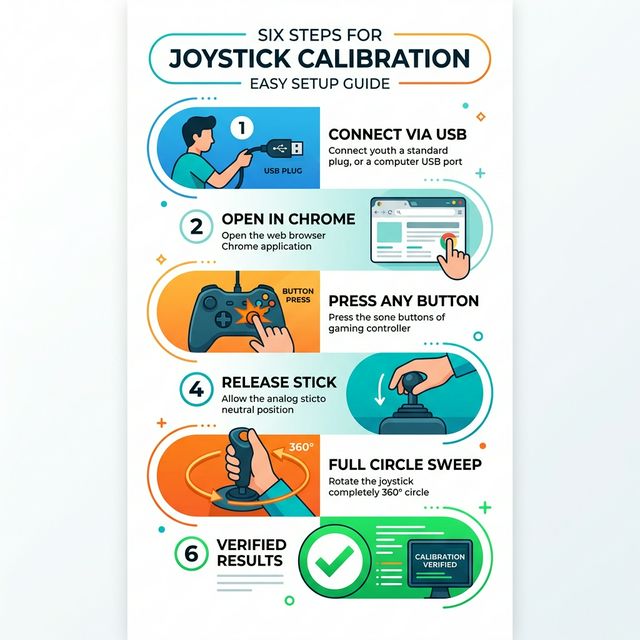
Rather than doing this blind, you can run a joystick calibration directly in your browser and see the before and after values on screen.
What Joystick Calibration Can and Cannot Fix
✓ Calibration Can Fix
- Minor center-offset from sensor shift
- Firmware-level miscalibration
- Static stick drift (consistent idle value)
- Dust accumulation affecting neutral point
✗ Needs Hardware Repair
- Physically worn or broken stick modules
- Severe, jittery vertical/horizontal drift
- Worn-out carbon tracks (potentiometers)
- Mechanical "snapping" or loose sticks
Before deciding if it's broken, you should test your stick drift directly to see the raw idle output after calibration.
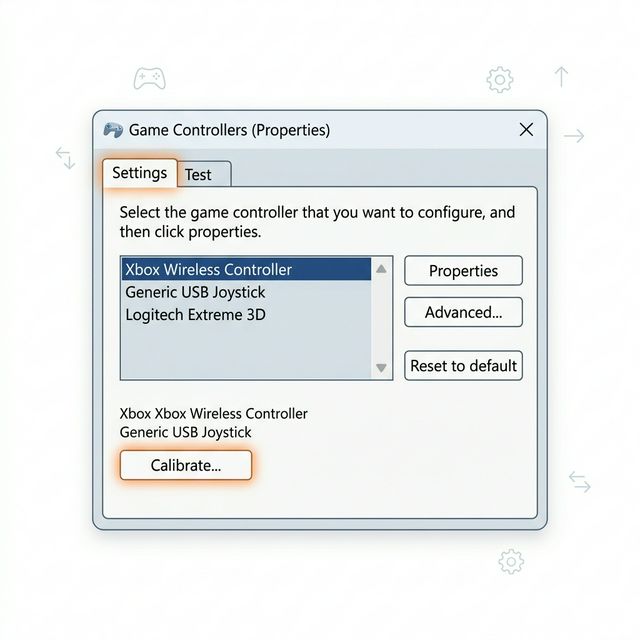
Why Joystick Calibration Goes Wrong
The Windows Calibration Tab Is Hidden
On Windows 10 and 11, the legacy calibration tool is still the most effective manual method. To find it:
- 1. Press Win + R on your keyboard.
- 2. Type
joy.cpland press Enter. - 3. Select your controller and click Properties > Settings > Calibrate.
If the tab is missing, you likely need the specific XInput or manufacturer driver for your gamepad.
Steam Input Overrides
Steam has its own calibration system under Settings > Controller > General Controller Settings. To avoid conflicts, ensure your game's individual controller layout is set to "Default" deadzone behavior rather than custom values.
Frequently Asked Questions
Ready to Get Precision Back?
Join thousands of gamers who use MyGamepadTester to keep their gear in peak condition. After calibrating, don't forget to test every button on your controller to ensure everything is game-ready.
Related Resources
- Hardware Calibration Guides — Step-by-step repair guides
- How to Calibrate a Controller on Windows 11 — In-depth analysis & data
Last updated: July 7, 2026